> ## Documentation Index
> Fetch the complete documentation index at: https://docs.qwacks.com/llms.txt
> Use this file to discover all available pages before exploring further.
# Quickstart
> From zero to an authenticated player in five steps with the Flock SDK.
This guide takes you from a fresh game to your first signed-in player using the Flock SDK.
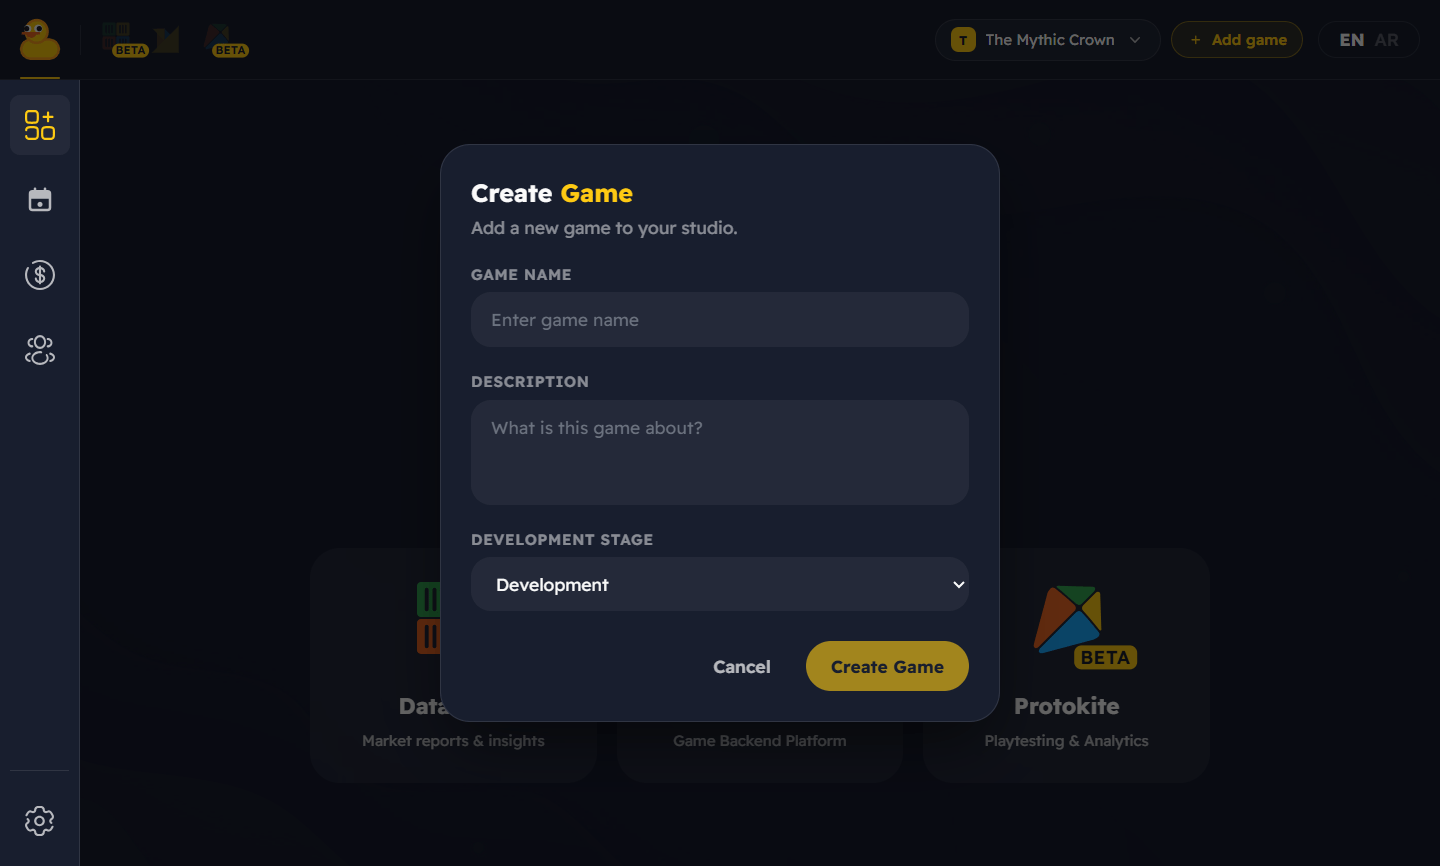
Sign in to the [Qwacks dashboard](https://flock-saas.qwacks.com), create a **studio**, then create a
**game** inside it. A game is the container for your players, economy, and config.
 Open your game in the dashboard and copy its **API Key**, **Game ID**, and **Game Version**.
You'll plug these into the SDK so it can connect to your game.
Open your game in the dashboard and copy its **API Key**, **Game ID**, and **Game Version**.
You'll plug these into the SDK so it can connect to your game.
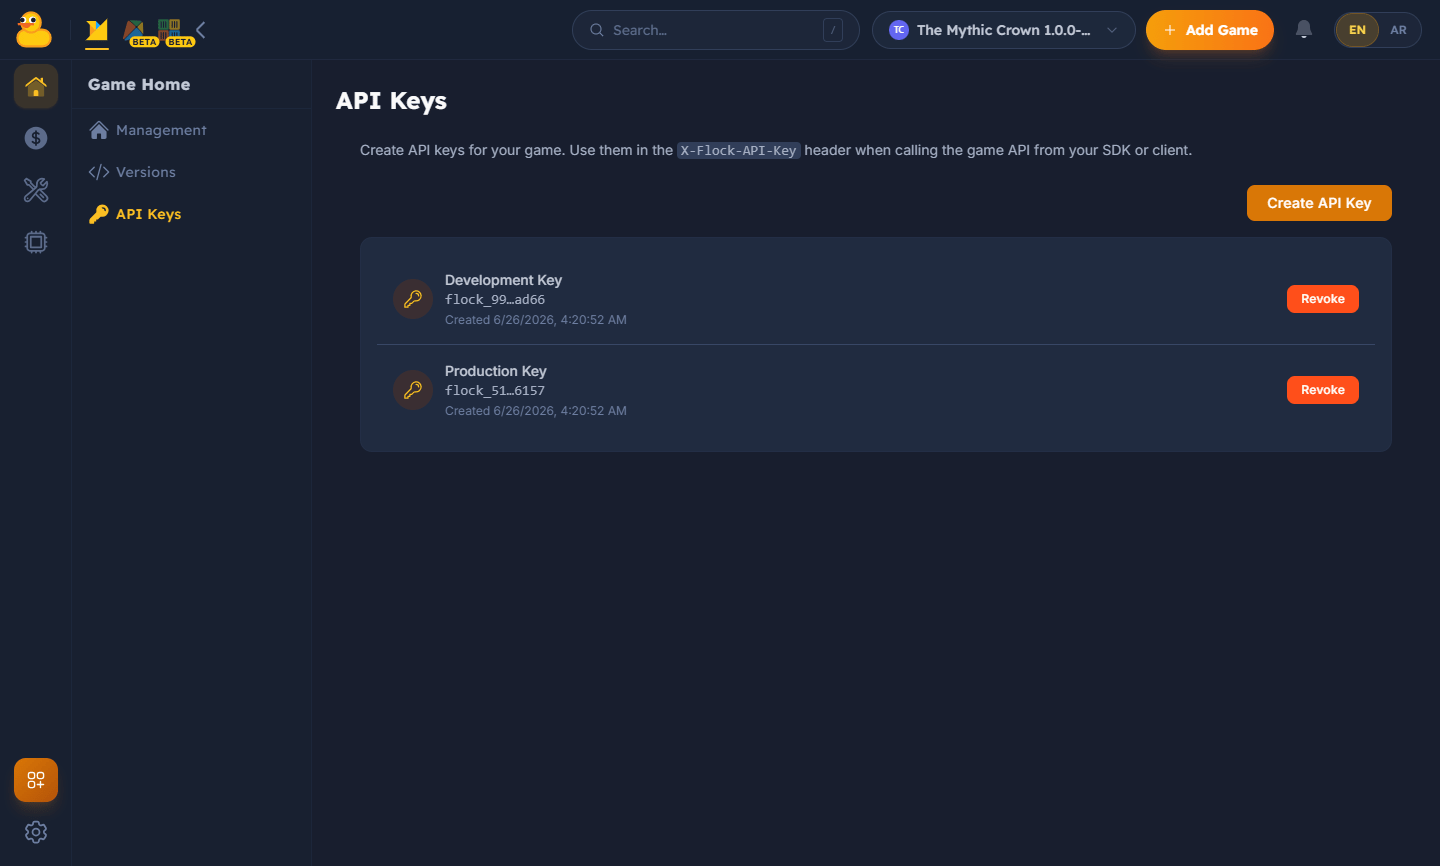 Treat your API Key like a password. Use a key scoped to the right environment, keep dev and
production separate, and rotate it on the dashboard if it leaks.
Add the [Flock Unity SDK](/sdk/unity), then open **Qwacks → Flock** and paste in your
credentials. The window prepares the two things the SDK needs before it can start:
* **Resolve Game Version** — looks up your version's ID and bakes it into the config. Runtime init
uses that ID directly and never calls the server, so it must resolve before you play or build.
The window does this automatically as you fill in your credentials.
* **Verify** — confirms your credentials reach Flock (Setup checklist → **Verify**).
Then choose how the SDK starts:
* **Automatic (default):** with **Auto-Initialize On Load** on, the SDK initializes itself before
the first scene — nothing to call. Just use `FlockClient.Instance`.
* **Manual:** turn it off and call `FlockClient.Create(config.ToInitConfig())` yourself (or use the
`FlockBootstrap` component) — handy to wait for a splash screen or EULA.
Full details on all three init styles are on the [Unity SDK](/sdk/unity) page.
Sign the player in. The first sign-in registers them automatically; the SDK manages the session
from there. Auth methods **throw** on failure.
```csharp theme={null}
await FlockClient.Instance.Authentication.LoginWithEmailAsync("player@example.com", "hunter2");
Debug.Log($"Signed in as {FlockClient.Instance.CurrentPlayerId}");
```
Once a player is signed in, call any service through `FlockClient.Instance`:
```csharp theme={null}
var game = await FlockClient.Instance.Game.GetGameAsync();
Debug.Log($"Playing {game.Name}");
```
That's it — you're live. 🎉
## Next steps
How the SDK manages game and player sessions.
Players, shops, leaderboards, remote config, and more.
Treat your API Key like a password. Use a key scoped to the right environment, keep dev and
production separate, and rotate it on the dashboard if it leaks.
Add the [Flock Unity SDK](/sdk/unity), then open **Qwacks → Flock** and paste in your
credentials. The window prepares the two things the SDK needs before it can start:
* **Resolve Game Version** — looks up your version's ID and bakes it into the config. Runtime init
uses that ID directly and never calls the server, so it must resolve before you play or build.
The window does this automatically as you fill in your credentials.
* **Verify** — confirms your credentials reach Flock (Setup checklist → **Verify**).
Then choose how the SDK starts:
* **Automatic (default):** with **Auto-Initialize On Load** on, the SDK initializes itself before
the first scene — nothing to call. Just use `FlockClient.Instance`.
* **Manual:** turn it off and call `FlockClient.Create(config.ToInitConfig())` yourself (or use the
`FlockBootstrap` component) — handy to wait for a splash screen or EULA.
Full details on all three init styles are on the [Unity SDK](/sdk/unity) page.
Sign the player in. The first sign-in registers them automatically; the SDK manages the session
from there. Auth methods **throw** on failure.
```csharp theme={null}
await FlockClient.Instance.Authentication.LoginWithEmailAsync("player@example.com", "hunter2");
Debug.Log($"Signed in as {FlockClient.Instance.CurrentPlayerId}");
```
Once a player is signed in, call any service through `FlockClient.Instance`:
```csharp theme={null}
var game = await FlockClient.Instance.Game.GetGameAsync();
Debug.Log($"Playing {game.Name}");
```
That's it — you're live. 🎉
## Next steps
How the SDK manages game and player sessions.
Players, shops, leaderboards, remote config, and more.